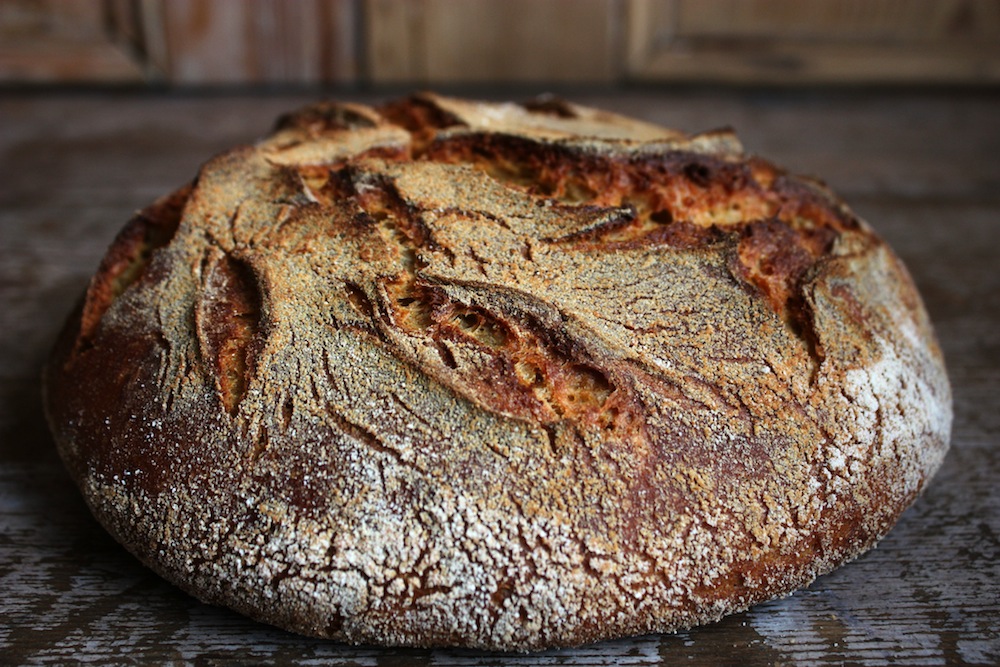
This all began with a new Michette. Wait. So, what exactly is the definition of my Michette? It's a boule made with home-milled whole grain and hand-bolted flour, or 100% bolted flour. It generally makes for a flattish loaf with a tighter, more even crumb. Like a mini Miche, hence the name. OK, so, I was busy bolting away some Iraqi Durum, right, coming up with a new bread for us all. And you know how durum is, right, super hard with spiky little molecules that rip at the gluten structure. Yes, there is plenty of protein in this hard grain, but the quality of it is not conducive to achieving much oven spring. Hence my idea of bolting part of the flour to soften those angry little particles. Let me tell you, the resulting Michette was lovely.

Of course, I couldn't stop there. I wondered if I could make a durum loaf using 100% hand-milled whole grain. A challenge, right, because of the nature of durum. So how do the Italians do it then? How do they make lovely loaves with 100% durum? Just to revive our understanding of durum, we all know that durum is a very hard wheat, yeah? I think the hardest. We know that, as aforementioned, the milled grain produces barbed molecules that slice away at our gluten structure, what little it has anyway, since the protein, while pretty high in percentage, is weak. We also know that semolina flour is made from durum, but semolina refers to the flour's coarse grind, not the grain itself. What I never knew, but that which I learned through this experiment, is that in Italy when bakers make durum loaves, they use a specific grind of durum called rimacinato, which translates as 'regrind'. So, when you buy a bag of semola di grano duro rimacinato, you are conceivably buying durum wheat that has been ground twice to break down those harsh little molecules a little further, smooth out their spiny little edges. This is the flour that bread makers in Italy use. Hm, sounds dubious, sounds like there is something else going on here. More on this in a second. Anyway, I decided to take up the idea of remilling my semolina, transforming it into this lovely sounding flour.

There was not much information on the net about 100% durum loaves, and all of the breads I ran across either involved the addition of strong flour or employed this commercially made rimacinato which creates a loaf of bread with fantastic oven spring. Because of such, I would venture to guess that some other technique is involved in the processing of this flour because you are not going to get crazy oven spring if you are making rimacinato at home. While the breads I saw using this commercial rimacinato were beautiful, I wanted rustic loaves, truly hand-made loaves that would reflect the sort of country breads you might find on a Sicilian table. Judging by the breads produced by the commercial flour, I suspect that while it is 100% durum wheat, it is likely not whole durum wheat, but rather white flour, just like any ordinary bread flour, but made from durum berries. It's okay if it is. Just not what I was after here.

I made several loaves of bread for this experiment, double testing the formulae that you see here, playing with hydration. I think altogether I made seven loaves to get them just right. First up is our Michette, in durum. A definitive keeper. It made a really gorgeous loaf, chewy crumb, fantastic nutty, sweet flavor. It was lovely plain, toasted, drizzled with olive oil, slathered with pesto and suffocated with slices of first of the season heirloom tomatoes and fleur di sel. Then I baked up three loaves of my newest invention, which I am calling my Pane Siciliano. I hand-ground some rimacinato, employing a double grind technique, right. First grind on sort of a standard setting on the Komo. This produced what would be regarded as semolina. I then sent it through the mill again on a finer grind, thus, our rimacinato is born. And all three loaves were an experiment with hydration as well, so I could get it right for the post.

Finally, and here's something, I baked up another three loaves of my Pane Siciliano, again making my hand-ground rimacinato, but this time I experimented with a triple grind to see what sort of crumb it would yield, perhaps it would contribute to a higher loft (though for this loaf, as with my Michette, I am partial to a flattish loaf with a tighter, more even crumb). I employed the double ground technique as above, then cooled it a bit before sending it through the mill a third time on a finer setting. What resulted was a very, very fine flour. Almost imperceptible to the touch.

The resulting breads were fantastic. As we are all surely aware, the danger of durum breads can be a really tough cortex, especially with protracted baking times. But all of our experiments here resulted in lovely, tender crusts, and on that note, a decidedly earthy, nutty almost buttery crumb. Sweet and moist, a touch of acid. I will say, I didn't notice much difference in taste or texture between the double and triple milled breads, save for the crust of the double-milled which was only minutely more firm. They were both aesthetically pleasing as well. But to save time and effort, I would probably incline toward the double-mill when making a Pane Siciliano in the future.
The things you need to know about this bread is that it ferments very quickly, so you may not want to push fermentation times. For your benefit, I played with hydration and fermentation times within these 7 loaves, and the formulae here exhibit the ideal measurements and method. Finally, the loaves also bake really quickly, so, don't crank the oven beyond 450 degrees after the first 15 minutes of steam or you will likely pull them out prematurely. This is a very wet dough, so it needs the full hour to bake. Use your thermometer for this one guys or you may end up with an underbaked crumb.
This afternoon I had several slices with pesto and tomato, olive oil, and nipped at it plain every time I walked into the kitchen. Just a lovely rustic loaf to add to our repertoire. Please let me know how your Pane Siciliano works out for you. These are the perfect breads to compliment your next Italian feast, or frankly to bake up weekly. If this bread is one of peasant ancestry, it is the king of its kind.
Here is the method for both our kingly Pane Siciliano and our new Michette.

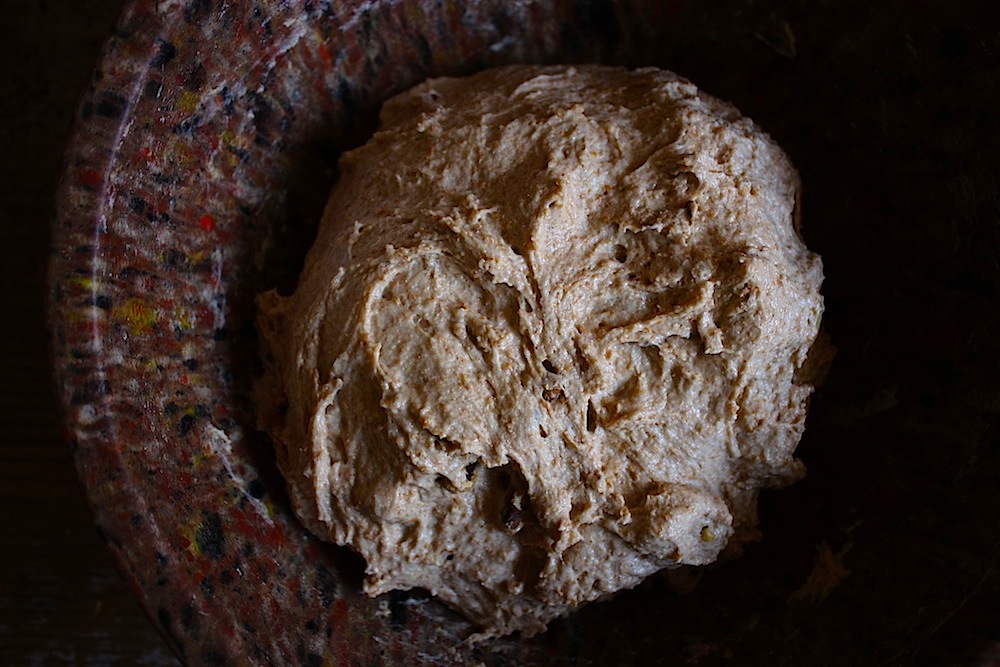
Mix up the above. You will arrive at a very firm paste. It's okay, it will loosen as it ferments. Mine fermented for 6 hours.




k
MICHETTE, IN DURUM


Michette, in Iraqi Durum
Pane Siciliano
I made several loaves of bread for this experiment, double testing the formulae that you see here, playing with hydration. I think altogether I made seven loaves to get them just right. First up is our Michette, in durum. A definitive keeper. It made a really gorgeous loaf, chewy crumb, fantastic nutty, sweet flavor. It was lovely plain, toasted, drizzled with olive oil, slathered with pesto and suffocated with slices of first of the season heirloom tomatoes and fleur di sel. Then I baked up three loaves of my newest invention, which I am calling my Pane Siciliano. I hand-ground some rimacinato, employing a double grind technique, right. First grind on sort of a standard setting on the Komo. This produced what would be regarded as semolina. I then sent it through the mill again on a finer grind, thus, our rimacinato is born. And all three loaves were an experiment with hydration as well, so I could get it right for the post.
Pane Siciliano (double grind)
Pane Siciliano (triple grind)
The things you need to know about this bread is that it ferments very quickly, so you may not want to push fermentation times. For your benefit, I played with hydration and fermentation times within these 7 loaves, and the formulae here exhibit the ideal measurements and method. Finally, the loaves also bake really quickly, so, don't crank the oven beyond 450 degrees after the first 15 minutes of steam or you will likely pull them out prematurely. This is a very wet dough, so it needs the full hour to bake. Use your thermometer for this one guys or you may end up with an underbaked crumb.
This afternoon I had several slices with pesto and tomato, olive oil, and nipped at it plain every time I walked into the kitchen. Just a lovely rustic loaf to add to our repertoire. Please let me know how your Pane Siciliano works out for you. These are the perfect breads to compliment your next Italian feast, or frankly to bake up weekly. If this bread is one of peasant ancestry, it is the king of its kind.
Here is the method for both our kingly Pane Siciliano and our new Michette.
PANE SICILIANO
LEVAIN DAY
Three days before you plan to make your levain, throw your starter into overdrive by feeding it three times each day. On the fourth day, build your levain:
-10g 100% hydration starter
-75g rimacinato (double milled) durum wheat flour (I used Iraqi Durum for all of our experiments, but you can use a non-heritage varietal if you can't find Iraqi)
-75g rimacinato (double milled) durum wheat flour (I used Iraqi Durum for all of our experiments, but you can use a non-heritage varietal if you can't find Iraqi)
-82g h2o
Mix up the above. You will arrive at a very firm paste. It's okay, it will loosen as it ferments. Mine fermented for 6 hours.
Levain, Just Mixed
Fermented
DOUGH DAY
You will need:
-All of the levain
-530g h2o (no, this is not a typo. This is a very thirsty flour, which you will discover)
-500g freshly milled durum that has been milled once on a semi-fine setting, cooled a bit, then sent through the mill a second time on a fine setting (you will have to stir the flour in the hopper to push it through the stones). If you want to experiment with triple milled durum, cool the rimacinato, then send it through the mill a third time (again, you will have to stir the flour in the hopper to push it through the stones)
-12g kosher salt, I used Diamond
When the levain is at its peak, mix it with the flour and h2o until you reach a shaggy mass. Autolyse for 45 minutes.
After the autolyse, squish the salt into the dough so that it is thoroughly incorporated. Now begin your 3-hour bulk fermentation. Here you will perform a series of turns for the first two hours of bulk. Leave it be for the final hour.
* This dough will not gain obvious gluten formation. It will feel grainy as you do your turns, with only slight gluten formation. It does not have elasticity which we are familiar with when working with hard winter wheat flours either, so, it will indeed 'break' when you pull it up and stretch it during the folds. All is fine. It will ferment nicely despite this. Indeed, as you can see, this flour ferments very, very quickly. If you will notice both the reduced autolyse and bulk fermentation times. The final fermentation is also reduced considerably. My advice is not to push it. I have conducted this experiment with longer fermentations, higher hydration, and lower hydration and what you see here is the optimal method, measurements and fermentation times. The only change you might make is to refrigerate the dough after the first hour of bulk if it is very warm (above 80 degrees) where you are, and complete the bulk fermentation cold. Still, avoid pushing the fermentation time as this dough quickly overferments.
* This dough will not gain obvious gluten formation. It will feel grainy as you do your turns, with only slight gluten formation. It does not have elasticity which we are familiar with when working with hard winter wheat flours either, so, it will indeed 'break' when you pull it up and stretch it during the folds. All is fine. It will ferment nicely despite this. Indeed, as you can see, this flour ferments very, very quickly. If you will notice both the reduced autolyse and bulk fermentation times. The final fermentation is also reduced considerably. My advice is not to push it. I have conducted this experiment with longer fermentations, higher hydration, and lower hydration and what you see here is the optimal method, measurements and fermentation times. The only change you might make is to refrigerate the dough after the first hour of bulk if it is very warm (above 80 degrees) where you are, and complete the bulk fermentation cold. Still, avoid pushing the fermentation time as this dough quickly overferments.
After the bulk fermentation, scrape the dough onto a worktable that you have dusted with brown rice flour, gather it into a loose round and let it rest for 5 minutes.
After it has rested, shape it using the 'Forkish fold' method, which is best for this dough. As you will quickly find, the dough will seem to disintegrate in your hands. You will not be able to shape it uber-tightly. Do the best you can. Just fold the sides up over the dough toward the center of the mass, spinning the dough until all of the edges are folded over to the center to create as tight a boule as possible. It will seem like this is never going to work. It will feel grainy to the touch. It's fine. Just forge on. The Forkish fold also affords another advantage. You cannot and should not attempt to score this dough. It won't work. It is very much like a high-percentage rye bread where the method is to let it fissure and open up at its natural cracks. You will place the dough seam side down, so that when you flip it on bake day, it will land seam side up, thus allowing the steam to escape and the loaf to organically 'self-score'. Moving along... pop it into a banneton or a bowl lined with a linen that has been dusted with brown rice flour, again, seam side DOWN.
Cover and get it into the fridge and ferment 8 hours.
BAKE DAY
One hour before you plan to bake the bread, preheat the oven to 500 degrees, installed with a baking stone and both halves of your combo cooker.
After the hour preheat, remove the dough bowl from the fridge, place a piece of parchment over the mouth of it, then a pizza peel on top of this, now flip the whole thing over so that the dough ends up on top of the parchment and peel. Remove the linen (if you have over dusted, now is the time to brush away any loose flour. I know, I have been the victim of some snowy loaves too).
Slide it into the shallow end of the combo cooker. Cover with the fat end and steam the loaf at 500 degrees for 15 minutes. Now turn the oven down to 450 and bake for another 15. After the steam, remove the lid, pop it beneath the pan for a little buffer to protect the bottom of your loaf and bake out at 450 degrees.
This loaf browns up quickly, so, keep the temperature modest for the rest of the bake. You decidedly do not want to go to chestnut brown with durum loaves, or the cortex will become hard as a rock, and you do not want to crank the oven or the interior will not bake properly. This is a really wet dough, and needs the full hour to bake. Be sure to take the temp to at least 210-212 before pulling it out of the oven. The recommended temp here should should keep the loaf more on the golden brown end of the color scheme.

After the steam, remove the lid and bake till you reach the recommended temp, rotating the pan as you go to avoid dark patches.
This loaf browns up quickly, so, keep the temperature modest for the rest of the bake. You decidedly do not want to go to chestnut brown with durum loaves, or the cortex will become hard as a rock, and you do not want to crank the oven or the interior will not bake properly. This is a really wet dough, and needs the full hour to bake. Be sure to take the temp to at least 210-212 before pulling it out of the oven. The recommended temp here should should keep the loaf more on the golden brown end of the color scheme.
Perfectly Steamed
Allow to cool for at least two hours before slicing. The interior will be moist beyond belief, the crust will be crisp but tender.
The formula for the Michette is below this group of pictures:
k
MICHETTE, IN DURUM
LEVAIN DAY
Three days before you plan to make your levain, throw your starter into overdrive by feeding it three times each day. On the fourth day, build your levain:
-10g 100% hydration starter
-75g single milled durum wheat flour (I used Iraqi Durum for all of our experiments, but you can use a non-heritage varietal if you can't find Iraqi)
-75g h2o
Mix up the above. You will arrive at a very firm paste. It's okay, it will loosen as it ferments. Mine fermented for 8.5 hours.
DOUGH DAY
You will need:
-All of the levain
-480g h2o
-250g freshly milled durum that has been milled once on a semi-fine setting
-250g freshly milled durum that has been milled once on a semi-fine setting, then bolted through a sieve using a #50 screen
-12g kosher salt, I used Diamond
-A good glug of olive oil, I don't know, 15g perhaps? I used California Olive Ranch extra virgin
When the levain is at its peak, mix it with the flour and h2o until you reach a shaggy mass. Autolyse for 45 minutes.
Just Before Autolyse
Growing
Autolyse Accomplished
After the autolyse, squish the salt and olive oil into the dough so that it is thoroughly incorporated. Now begin your 3-hour bulk fermentation. Here you will perform a series of turns for the first two hours of bulk. Leave it be for the final hour.
* This dough will not gain obvious gluten formation. It will feel grainy as you do your turns, with only slight gluten formation. It does not have elasticity which we are familiar with when working with hard winter wheat flours either, so, it will indeed 'break' when you pull it up and stretch it during the folds. All is fine. It will ferment nicely despite this. Indeed, as you can see, this flour ferments very, very quickly. If you will notice both the reduced autolyse and bulk fermentation times. The final fermentation is also reduced considerably. My advice is not to push it. I have conducted this experiment with longer fermentations, higher hydration, and lower hydration and what you see here is the optimal method, measurements and fermentation times. The only change you might make is to refrigerate the dough after the first hour of bulk if it is very warm (above 80 degrees) where you are, and complete the bulk fermentation cold. Still, avoid pushing the fermentation time as this dough quickly overferments.
After the bulk fermentation, scrape the dough onto a worktable that you have dusted with brown rice flour, gather it into a loose round and let it rest for 5 minutes.
After it has rested, shape it using the 'Forkish fold' method, which is best for this dough. As you will quickly find, the dough will seem to disintegrate in your hands. You will not be able to shape it uber-tightly. Do the best you can. Just fold the sides up over the dough toward the center of the mass, spinning the dough until all of the edges are folded over to the center to create as tight a boule as possible. It will seem like this is never going to work. It will feel grainy to the touch. It's fine. Just forge on. The Forkish fold also affords another advantage. You cannot and should not attempt to score this dough. It won't work. It is very much like a high-percentage rye bread where the method is to let it fissure and open up at its natural cracks. You will place the dough seam side down, so that when you flip it on bake day, it will land seam side up, thus allowing the steam to escape and the loaf to organically 'self-score'. Moving along... pop it into a banneton or a bowl lined with a linen that has been dusted with brown rice flour, again, seam side DOWN.
Cover and get it into the fridge and ferment 8 hours.
BAKE DAY
One hour before you plan to bake the bread, preheat the oven to 500 degrees, installed with a baking stone and both halves of your combo cooker.

After the hour preheat, remove the dough bowl from the fridge, place a piece of parchment over the mouth of it, then a pizza peel on top of this, now flip the whole thing over so that the dough ends up on top of the parchment and peel. Remove the linen (if you have over dusted, now is the time to brush away any loose flour. I know, I have been the victim of some snowy loaves too).
Slide it into the shallow end of the combo cooker. Cover with the fat end and steam the loaf at 500 degrees for 15 minutes. Now turn the oven down to 450 and bake for another 15. After the steam, remove the lid, pop it beneath the pan for a little buffer to protect the bottom of your loaf and bake at out 450 degrees.
Steamed
This loaf browns up quickly, so, keep the temperature modest for the rest of the bake. You decidedly do not want to go to chestnut brown with durum loaves, or the cortex will become hard as a rock, and you do not want to crank the oven or the interior will not bake properly. This is a really wet dough, and needs the full hour to bake. Be sure to take the temp to at least 210-212 before pulling it out of the oven. The recommended temp here should should keep the loaf more on the golden end of the color scheme.