Picking up where we left off with bolting flour vs. commercial high extraction vs. Tartine's 'high-extraction' (50/50 bread flour whole wheat flour mix), I have been working busily with bolting and I've arrived at some things I would like to share with you.

Baking is really expensive when you take experimentation and 'lost loaves' into consideration. So, I love that I'm able to tackle some hardcore experiments over here and post the thoroughly tested conclusions so that you can make these breads without wondering if they are going to end up in the trash. My main goal is to make sure that the breads and techniques on this blog will work for you, which is why I post so many pictures and really go into detail about the methods employed for each loaf, since all flours are not created equally. It's nice to see the consistency of the levain and the texture of the dough as it changes from mixup through final fermentation. I'm really visual, so I love it when people share their bread making steps through photographs.
So, with home-milling, we are getting into more complex territory. The doughs that we are creating are far more volatile and require us to be more attuned than we are accustomed to. For example, freshly-milled grains must be used immediately after milling, or aged, as I discussed in an earlier post that first introduced the method of bolting and aging your flour. As well, breads made with freshly-milled flour ferments much more quickly than store-bought flour, so, likely your fermentation times will be shortened. When working with a new grain that I've milled, I keep a close eye on the fermentation rate, and use a 3-hour bulk fermentation and 9-hour final fermentation as baseline times. I check in at these points and if the dough is fermenting quickly, I can stop fermentation at either bulk or final, and if it's fermenting more slowly, I can push both of those stages past my baseline fermentation times. This is my first go round with Red Fife, and I was able to push a 4-hour bulk fermentation, noting that while it was not super speedy, it was definitely fermenting faster than an aged/store-bought flour. I knew by the look of it that it was going to need a shorter final ferment, but I dare say, the next time around, I think that I could conceivably push this fermentation time to 12 hours, so you may want to play with that when making this loaf. With home-milling you are the definitive pilot, where store-bought flour allows us to sort of coast on autopilot in some ways.

Chad's current book does not go into milling techniques, likely because not many people have mills, and to author a bread book, it's probably wise to tap into a wider market. The wider market purchases flour, hence the 50/50 mix that he describes as a viable option for high-extraction flour throughout his current book. He offers the option of purchasing high-extraction flour, but does not talk about bolting flour, so perhaps this is not a method that he is fond of. I cannot imagine that it's a very reasonable aim in a large-scale bakery unless you change its entire format. Admittedly, bolting flour is labor-intensive and it is indeed not the least expensive pursuit since the total bolted flour that you ultimately arrive at is a fraction of the starting amount; but if I am milling my own flour, there is nothing more satisfying than eating loaves of bread whose flour has been completely produced by my own hand rather than supplementing it with store-bought flour, regardless the sophistication of commercial high-extraction flour.
Bolted flour is an incredible thing. It allows us to 'lighten' our loaves while still remaining whole grain. Remember the in-depth post where I talk about the difference between commercial high-extraction and bolted flour. With hand-bolted flour, we cannot truly quantify (at home anyway, maybe if you had a lab...) the percentage of bran, germ and endosperm that is present, but we can deduce that it is pretty high, because whilst working with bolted flour, one must think of it as a whole grain flour when thinking of the outcome of the loaf because this is how it behaves. No wide-open crumbs here, but the flavor and texture and moisture in the resulting loaves made with bolted flour are incomparable.

The Red Fife I employed for this loaf is from Mendocino Grain Project, a sustainable and locally-minded granary in Ukiah, California. For my last project, I made 100% Red Fife scones with it and they were fantastic. So much so that I made a couple subsequent batches to share with friends who were thrilled with them.
I realize that I am catering to the slim margin of folks who might have a mill with these upcoming posts whose breads are all based on the art of bolting flour, but bear with me. Perhaps it will inspire you to invest in a mill yourself if you actually have a place to go that will offer some guidance. I am still learning, just like you, and it is here that I am happy to share my discoveries.
I like to think of myself as the first into the pool to test the waters. I think they call it being a guinea pig. Something like that. Funny story: my friend Christina came with me to the farmer's market. We were at the lovely Asian produce stand, stuffed with intriguing oddities that neither of us know how to use but would love to learn more about, when she picked up a feathery bundle of greens and wondered aloud how to cook such an exotic thing. I suggested that she purchase it, you know, experiment with it. She did agree, dear reader, but only after she shoved a slender green leaf into my mouth crying 'here, you die first!' Of course I didn't die. And I did buy a bunch with happy results. Guinea pig, me.

I will say that I have been fortunate with the whole 'lost loaf' situation. I have not had to pitch many breads for lack of success. What did Newton say? 'If I have seen further, it is by standing on the shoulders of giants.' So, Robertson, Hamelman, Peterson, Reinhart, Forkish, and countless authors' articles that I have found on the internet about flour, grains and fermentation, and how to make this whole thing work, have all lain this platform where from to start. I owe a debt of gratitude for all of their effort. I must say, however, that I have found almost zero information about bolting flour on the internet after a significant amount of time searching, and nothing in the books that I own. I did find a slim, archaic passage about hand-bolting whole flour in the days of yore, so, what I am presenting here in these posts is a little trail-blazey and I am all too happy to share it all with you. Free of charge. I was thinking that it would be nice to write a bread book (spawned by numerous requests from readers and friends), this is part of the reason why you have seen a meager few posts in the past two months. I took a little time to think about this, whether this was something that I wanted to pursue. I have been stacking up loaves, you know, researching, experimenting, and holding them back in case I chose to do a book thing. But this week I decided that I prefer doing things this way, you know, gratis. This is my way of giving something back to the world that I often feel gives so little and takes far, far too much, most often for personal gain, and without consideration of others. You only want to make great bread for the dinner table. That makes two of us. My profit is knowing how over-the-moon you feel when you pull a perfect loaf from your oven whose formula you have discovered on this blog. I also love the dialogue I have with the bakers who take time to write, and I think that there is a certain amount of nobility that comes with helping my brethren for the sake of enhancing his life in some small but significant way. Perhaps my experiments will be seen as contributions to the bread world, even if privately. We can all learn from one another, the giants from the dwarves, the dwarves that stand upon their shoulders for a broader view.
I know that Josey Baker is doing some extraordinary work with whole grains at his bakery The Mill. I got a chance to meet him some months back and to try a few of his loaves. A completely different style of bread than Chad's. Chad's bakery bakes up the style of bread that you will find in the book, obviously, and his loaves employ a large degree of white flour. Not a bad thing. I, for one, am not one of these whole grain zealots who think that white flour is evil. I love the tackiness that comes only from a perfectly fermented loaf of bread employing white flour. Chad's bread is definitely his style of bread, and it's beyond remarkable. I've tried to describe it justly, but the only way to know just how fantastic it is you have to experience it for yourself. Josey's bread is on the opposite side of the spectrum. I believe he told me only one or two of his dozens of breads use a small amount of white flour. They are all whole grain, and he mills it all himself. The resulting loaves are complex, rich and 'serious'. Gorgeous breads. And he is a lovely, lovely man with a quick smile and a playful personality. We talked a bit about milling when I met with him. I had just gotten my Komo, and it was he who inspired me to begin experimenting with breads employing 100% whole grains. I was, admittedly, of the camp that believed it was near impossible to make a great loaf of bread if it didn't employ at least some white flour. After tasting his, I could not have been proven more wrong.

I don't know if Josey bolts his flour, from the taste of it, I would say no. I think that he is a master of fermentation, and the loaves that he produces are purely his own signature, just like Chad's. Whatever the flour - hand-milled, store-bought, whatever brand - I think that it's important for all of us as bakers to find our own signature style. When making the breads from this blog, you are making what I believe to be the 'ideal' bread on a given day. They don't taste like Chad's, they don't taste like Josey's, and the methods that I employ determine what my bread will ultimately turn out to be. Chad loves a whole wheat/white starter, I'm not a fan. I'm not sure what type Josey employs, but I stand fiercely by my rye starter and I have no interest in changing this. It is the foundation of my breads. It is the foundation of my signature, as are my hydration preferences (Chad's hydration is impossibly high, impressively, impossibly high; my hat's off to anyone who can achieve it), and the fact that I bolt my flour when Chad would probably disagree with this method, preferring to use commercial high-extraction flour and his 50/50 white/whole wheat blend to pair with his whole grain breads, arriving at near-mystical result. But it doesn't matter what anyone's preferences are in our own breads, the only thing that matters is what resonates for us on this path. No right or wrong here folks. Just bread. Our way. When I stand on the shoulders of giants - Josey Baker, Nancy Silverton, and the list is long - what I am looking for is a road all my own. I believe that I have arrived, or at least I like the direction that I am headed, and most of all, I am thrilled that you all are here with me as I continue to plod along.
My method.

LEVAIN DAY
100% Red Fife
So, with home-milling, we are getting into more complex territory. The doughs that we are creating are far more volatile and require us to be more attuned than we are accustomed to. For example, freshly-milled grains must be used immediately after milling, or aged, as I discussed in an earlier post that first introduced the method of bolting and aging your flour. As well, breads made with freshly-milled flour ferments much more quickly than store-bought flour, so, likely your fermentation times will be shortened. When working with a new grain that I've milled, I keep a close eye on the fermentation rate, and use a 3-hour bulk fermentation and 9-hour final fermentation as baseline times. I check in at these points and if the dough is fermenting quickly, I can stop fermentation at either bulk or final, and if it's fermenting more slowly, I can push both of those stages past my baseline fermentation times. This is my first go round with Red Fife, and I was able to push a 4-hour bulk fermentation, noting that while it was not super speedy, it was definitely fermenting faster than an aged/store-bought flour. I knew by the look of it that it was going to need a shorter final ferment, but I dare say, the next time around, I think that I could conceivably push this fermentation time to 12 hours, so you may want to play with that when making this loaf. With home-milling you are the definitive pilot, where store-bought flour allows us to sort of coast on autopilot in some ways.
Chad's current book does not go into milling techniques, likely because not many people have mills, and to author a bread book, it's probably wise to tap into a wider market. The wider market purchases flour, hence the 50/50 mix that he describes as a viable option for high-extraction flour throughout his current book. He offers the option of purchasing high-extraction flour, but does not talk about bolting flour, so perhaps this is not a method that he is fond of. I cannot imagine that it's a very reasonable aim in a large-scale bakery unless you change its entire format. Admittedly, bolting flour is labor-intensive and it is indeed not the least expensive pursuit since the total bolted flour that you ultimately arrive at is a fraction of the starting amount; but if I am milling my own flour, there is nothing more satisfying than eating loaves of bread whose flour has been completely produced by my own hand rather than supplementing it with store-bought flour, regardless the sophistication of commercial high-extraction flour.
Bolted flour is an incredible thing. It allows us to 'lighten' our loaves while still remaining whole grain. Remember the in-depth post where I talk about the difference between commercial high-extraction and bolted flour. With hand-bolted flour, we cannot truly quantify (at home anyway, maybe if you had a lab...) the percentage of bran, germ and endosperm that is present, but we can deduce that it is pretty high, because whilst working with bolted flour, one must think of it as a whole grain flour when thinking of the outcome of the loaf because this is how it behaves. No wide-open crumbs here, but the flavor and texture and moisture in the resulting loaves made with bolted flour are incomparable.
The Red Fife I employed for this loaf is from Mendocino Grain Project, a sustainable and locally-minded granary in Ukiah, California. For my last project, I made 100% Red Fife scones with it and they were fantastic. So much so that I made a couple subsequent batches to share with friends who were thrilled with them.
I realize that I am catering to the slim margin of folks who might have a mill with these upcoming posts whose breads are all based on the art of bolting flour, but bear with me. Perhaps it will inspire you to invest in a mill yourself if you actually have a place to go that will offer some guidance. I am still learning, just like you, and it is here that I am happy to share my discoveries.
I like to think of myself as the first into the pool to test the waters. I think they call it being a guinea pig. Something like that. Funny story: my friend Christina came with me to the farmer's market. We were at the lovely Asian produce stand, stuffed with intriguing oddities that neither of us know how to use but would love to learn more about, when she picked up a feathery bundle of greens and wondered aloud how to cook such an exotic thing. I suggested that she purchase it, you know, experiment with it. She did agree, dear reader, but only after she shoved a slender green leaf into my mouth crying 'here, you die first!' Of course I didn't die. And I did buy a bunch with happy results. Guinea pig, me.
I will say that I have been fortunate with the whole 'lost loaf' situation. I have not had to pitch many breads for lack of success. What did Newton say? 'If I have seen further, it is by standing on the shoulders of giants.' So, Robertson, Hamelman, Peterson, Reinhart, Forkish, and countless authors' articles that I have found on the internet about flour, grains and fermentation, and how to make this whole thing work, have all lain this platform where from to start. I owe a debt of gratitude for all of their effort. I must say, however, that I have found almost zero information about bolting flour on the internet after a significant amount of time searching, and nothing in the books that I own. I did find a slim, archaic passage about hand-bolting whole flour in the days of yore, so, what I am presenting here in these posts is a little trail-blazey and I am all too happy to share it all with you. Free of charge. I was thinking that it would be nice to write a bread book (spawned by numerous requests from readers and friends), this is part of the reason why you have seen a meager few posts in the past two months. I took a little time to think about this, whether this was something that I wanted to pursue. I have been stacking up loaves, you know, researching, experimenting, and holding them back in case I chose to do a book thing. But this week I decided that I prefer doing things this way, you know, gratis. This is my way of giving something back to the world that I often feel gives so little and takes far, far too much, most often for personal gain, and without consideration of others. You only want to make great bread for the dinner table. That makes two of us. My profit is knowing how over-the-moon you feel when you pull a perfect loaf from your oven whose formula you have discovered on this blog. I also love the dialogue I have with the bakers who take time to write, and I think that there is a certain amount of nobility that comes with helping my brethren for the sake of enhancing his life in some small but significant way. Perhaps my experiments will be seen as contributions to the bread world, even if privately. We can all learn from one another, the giants from the dwarves, the dwarves that stand upon their shoulders for a broader view.
I don't know if Josey bolts his flour, from the taste of it, I would say no. I think that he is a master of fermentation, and the loaves that he produces are purely his own signature, just like Chad's. Whatever the flour - hand-milled, store-bought, whatever brand - I think that it's important for all of us as bakers to find our own signature style. When making the breads from this blog, you are making what I believe to be the 'ideal' bread on a given day. They don't taste like Chad's, they don't taste like Josey's, and the methods that I employ determine what my bread will ultimately turn out to be. Chad loves a whole wheat/white starter, I'm not a fan. I'm not sure what type Josey employs, but I stand fiercely by my rye starter and I have no interest in changing this. It is the foundation of my breads. It is the foundation of my signature, as are my hydration preferences (Chad's hydration is impossibly high, impressively, impossibly high; my hat's off to anyone who can achieve it), and the fact that I bolt my flour when Chad would probably disagree with this method, preferring to use commercial high-extraction flour and his 50/50 white/whole wheat blend to pair with his whole grain breads, arriving at near-mystical result. But it doesn't matter what anyone's preferences are in our own breads, the only thing that matters is what resonates for us on this path. No right or wrong here folks. Just bread. Our way. When I stand on the shoulders of giants - Josey Baker, Nancy Silverton, and the list is long - what I am looking for is a road all my own. I believe that I have arrived, or at least I like the direction that I am headed, and most of all, I am thrilled that you all are here with me as I continue to plod along.
My method.
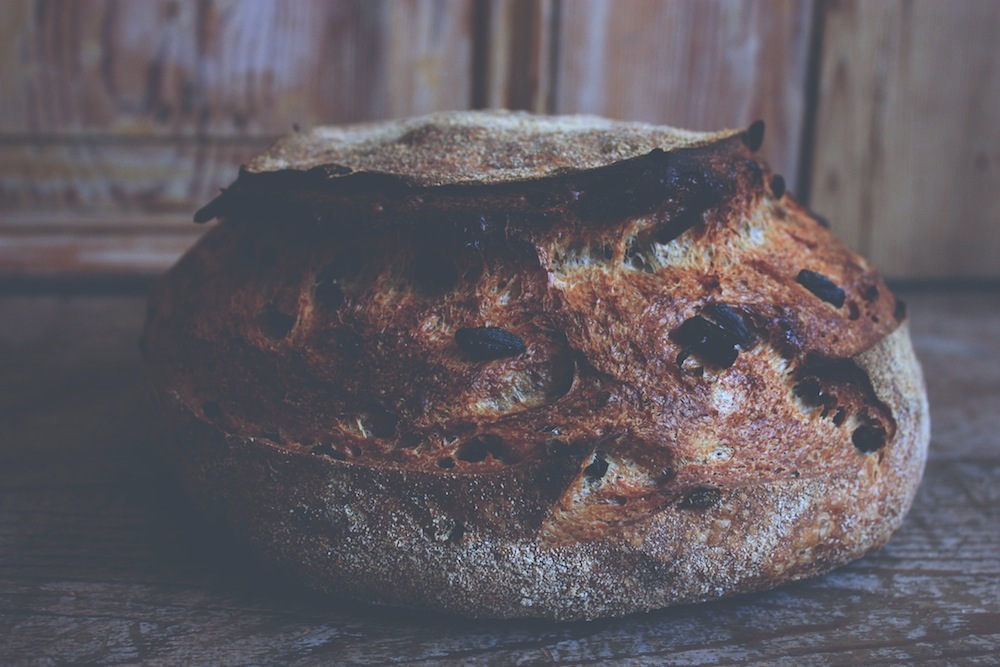
100% RED FIFE WALNUT BREAD : HAND-MILLED, HAND-BOLTED
Three days before you plan to make your levain, throw your starter into overdrive by feeding it three times each day. On the fourth day, build your levain:
10g 100% dark rye, 100% hydration starter
75g h2o
75g freshly milled Red Fife flour, I used grains from Mendocino Grain Project (MGP)
Mine fermented for 8 hours 50 minutes

You will need:
209g freshly milled MGP Red Fife flour
291G freshly milled MGP Red Fife flour that has been bolted through a #50 screen
125g toasted and cooled walnuts
12g kosher salt, I used Diamond

After the autolyse, squish the salt into the dough so that it is thoroughly incorporated. Now begin your 4-hour bulk fermentation. Here you will perform a series of turns until the dough really starts to expand and feel tight. You will fold in the walnuts at the second turn, working to keep it all in within the dough as much as you can. It's fine if a few pieces peek through, but by the end of the bulk, the majority of it should be encased in the dough or the peeking nuts will burn on bake day.

You will not perform turns through the entire 4-hour bulk, instead, you will intuitively know when it is time to stop by the rate of the dough's expansion, and here you will use a ginger hand, there are lots of nuts to contend with, see. I stopped my turns at 2 hours 15 minutes and popped the dough in the fridge for the remainder of the bulk because it was really warm in L.A.
DOUGH DAY
You will need:
All of the levain
350g h2o (you can try pushing this; try pushing it to 360g perhaps. You have some leeway for play here)209g freshly milled MGP Red Fife flour
291G freshly milled MGP Red Fife flour that has been bolted through a #50 screen
125g toasted and cooled walnuts
12g kosher salt, I used Diamond
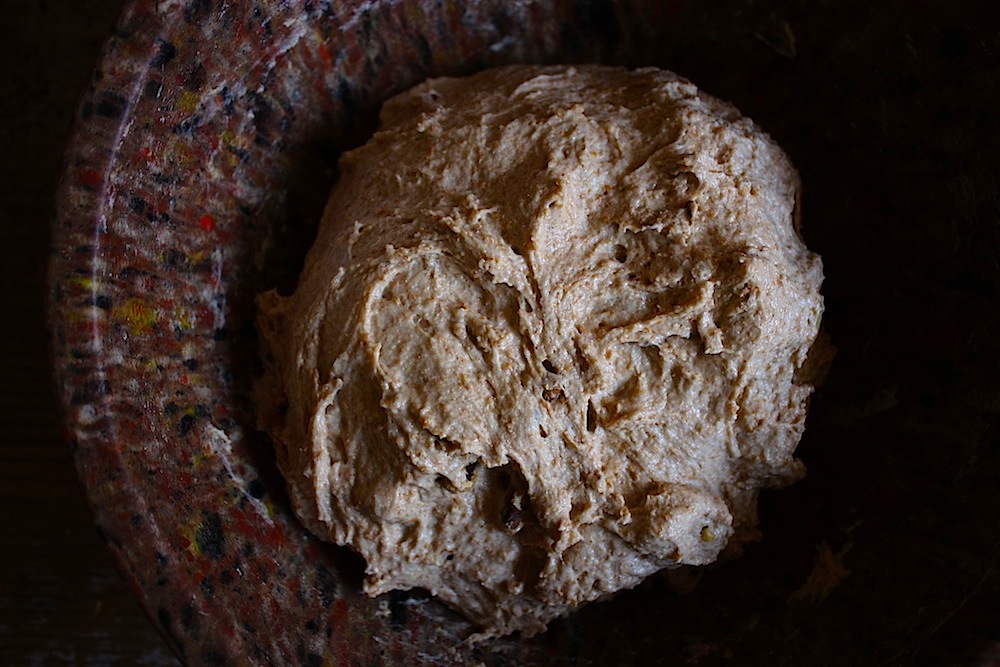
When the levain is at its peak, mix it with the flour and h2o until you reach a shaggy mass. Autolyse for 2 hours.

Just mixed
After Autolyse
nuts...
encased
After the bulk fermentation, scrape the dough onto a worktable that you have dusted with brown rice flour, gather it into a loose round and let it rest for about 10 or 15 minutes.

After it has rested, shape it into a taut boule. This time round I did a 'Forkish fold' rather than using the twist method that I do, where you fold the dough up into a neat little package, and pop it into a banneton or a bowl lined with a linen that has been dusted with brown rice flour, seam side DOWN. This way when you unearth the thing tomorrow, the seam lands upside and this creates some fabulous rustic fissures rather than the neat patterns we get from clean slashes made by razors and scissored nips.
Get it into the fridge and ferment 9 hours.
Get it into the fridge and ferment 9 hours.
BAKE DAY
One hour before you plan to bake the bread, preheat the oven to 500 degrees, installed with a baking stone and both halves of your combo cooker.
After the hour preheat, remove the dough bowl from the fridge, place a piece of parchment over the mouth of it, then a pizza peel on top of this, now flip the whole thing over so that the dough ends up on top of the parchment and peel. Remove the linen (if you have over dusted, now is the time to brush away any loose flour. I know, I have been the victim of some snowy loaves too).

Slide it into the shallow end of the combo cooker. Cover with the fat end and steam the loaf at 500 degrees for 15 minutes. Now turn the oven down to 475 and bake for another 15. After the steam, remove the lid and bake till chestnut brown.

You may have to toggle the oven between 450 and 475. Take the internal temp to 210 degrees.
steamed
You may have to toggle the oven between 450 and 475. Take the internal temp to 210 degrees.
Allow to cool for at least an hour, preferably two, before slicing. The interior will be moist beyond belief, the crust will shatter, though it has a teensy bit more muscle to it than those loaves made with at least a bit of white flour, and the flavor will drive you mad.


To the staff of life!
(This post was sent to Susan's Wild Yeast Blog)
To the staff of life!
(This post was sent to Susan's Wild Yeast Blog)