

Start where you are. Use what you have. Do what you can.
-Arthur Ashe (1943 - 1993)
THE JOURNEY
Silence...
More silence...
Oh, wow. No, like really, WOW.
Where do I begin? Well first, this is a gigantic post with loads of photos and musings, but ultimately one that I hope helps to demystify a rather curious and elusive bread that has captivated me for years. If you are familiar with Desem, you won't be surprised by the scope of it. I actually began the Desem experiment over a month ago. I've baked up around 20 loaves of it so far to be sure I've nailed this thing before passing it on to you. So, grab a cuppa something because you're gonna need it.
OK, here goes: Remember when you made your first starter? You were well proud. In the first few days she showed signs of life, okay, maybe only minute signs, but they were nevertheless thrilling, those glossy gas chambers like obsidian beads suspended in an oyster-colored cloud of rye. And you watched over her like a vigilant hen watches over her brood, mincing on tiptoe when you approached, panicking when you found her collapsed into a thick paste after a long night alone on the counter, having consumed her feast while you slept. In those early days, even the smallest sign of fermentation practically made you burst out of your skin, and you went ahead and baked with her when she was barely able to stand. You felt a little like a toddler taking his/her first toddler steps out into the great unknown. 'Man, this walking stuff is hard!' you thought in your little toddler head. 'My legs are on fire! But I see the promise in all of this. I'll keep going with it, no matter how many times I fall... I'll keep going if my legs fall off, so help me!' And fall you did. All those lopsided loaves, the ones that never quite got the oven spring you had dreamed of the night before the bake, and the oddly fermenting loaves that left weird gaping holes (no, those big holes surrounded by dense bread are NOT an 'open crumb' -- you will see signs of this in the first Desem loaves I've posted below; it is a sign of an adolescent levain, or in this case, Desem).
But it's all good, yeah? These are the badges of a baby starter just learning to spread its wings. Babies need time to grow and mature into awesome beings. I mean, yes, babies are awesome, but they do fall an awful lot, I'm just sayin'. Eventually you learn to walk really well. In fact, you're sprinting at the drop of a hat, not even thinking of your legs at all. This is your bread stride. You've hit it, and it feels so good that you pretend to be humble when your friends tell you how great your loaves are. So great, in fact, that there is no bread in (insert name of city/town here) that could even come close. And you know its true. On the outside you're saying 'oh, please, you are too kind', but on the inside, oh, it’s a different story, on the inside you’re saying 'yeah, badass, me', and you take off, not even sprinting anymore, no, now you're flying laps around (insert name of city/town/CONTINENT here). You're practically a goddamned phoenix!
Well, prepare to have your wings clipped.

Desem: baby steps
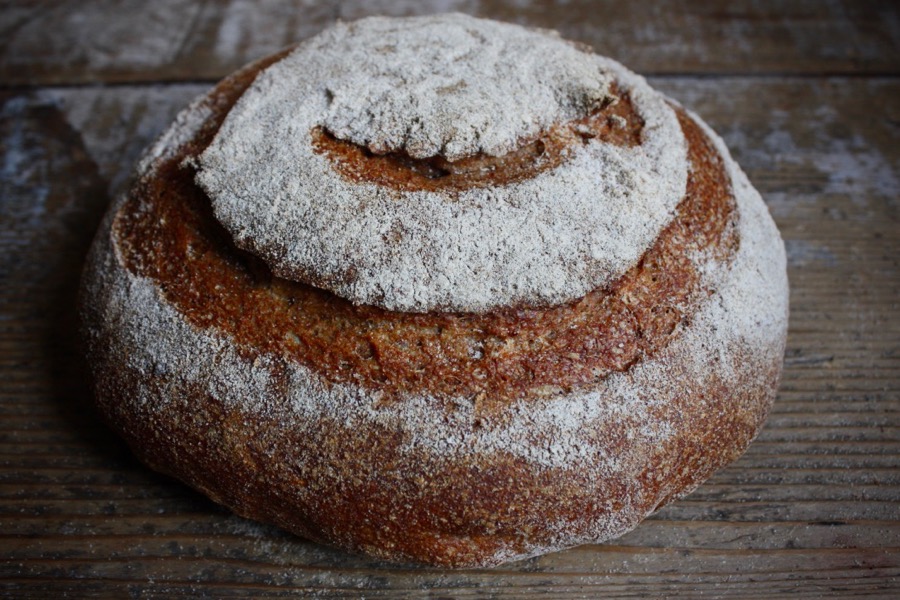
The above photo is the first loaf of Desem that I baked. My culture is only a handful of days old. With hesitation I followed the directions in The Laurel's Kitchen Bread book to bake up a loaf when the culture was far too young. It is, incidentally, the only book that I’ve found that discusses how to make this forgotten bread. It uses cups as measures, presumably to appeal to the hippies back then who had did not use scales. There is another book, The Bread Builders, that gives a nutshell idea of how the author works with his Desem in a handful of terse sentences. Indeed, the author of the book worked with Laurel in developing his own Desem as they shared stomping grounds, so he mentions his method for working with his already developed culture, but does not talk about how to birth the Desem culture itself.
Laurel directs her readers to make a loaf of bread with a very immature Desem culture, just one week old, so that one can witness its maturation and gain a sense of the ultimate goal. I almost abandoned the idea because there is nothing more disheartening than pulling a loaf of bread from the oven bearing all the marks of poor fermentation. I did it anyway. A humbling kick in the pants, maybe, but I must confess, it also bore signs of hope. Laurel was onto something.

The Desem build: a naked fermentation
Onward.
Some of you might be wondering what Desem is, and how it differs from other sourdough breads. It is a little bit of a mystery. I have at least a dozen bread books, and only three of them mention this fascinating bread, and only briefly so, like, no more than a shout out, really, except, of course, the Laurel's Kitchen Bread Book. What I have found is that it is a 100% whole wheat Flemish bread, made with a culture of the same name. Desem means 'leaven' in Dutch. The culture, a very stiff one, is birthed from freshly milled, whole wheat flour and water. Speaking of, please don't fall for blogs that begin their Desem cultures with flour, water and a little 'help' from their sourdough starter. You can make a Desem well and truly without cheating by way of using your sourdough starter to help it emerge. You will be much more satisfied if you bring one to fruition with flour, water, patience and the skill that you have already acquired in working with your previous starters. Further, I am here to help you. Just keep reading this long-winded post to discover how.
The Desem culture is so stiff that it feels like a ball of medium-soft clay. The most unique identifying component of this Flemish dinosaur, the sole thing that drew me to it to begin with, is that it is stored submerged in a bed of wheat flour. How magnificent, the idea of an umber wedge, dense with enzymatic activity, cloaked in a flour bed. How rich, how unlike the naked, nonetheless bewitching, slurry that has lived in a jar on my counter for so many years.

Desem culture, quietly maturing
Desem cultures thrive in the Flemish atmosphere, that is to say a cool one, and it produces a very strong rise. The resulting bread is absent of any sourness due to the fact that it is borne and kept under strictly cool conditions. In fact, for such a large portion of culture used in the breads, it tastes of clean, sweet grain.
I have discovered the reasons why it is not widely talked about. It's complicated, I'm not going to lie. It's a little tedious to manage at the start. The culture's activity is not so obvious, there are no telltale signs like gorgeous gassy bubbles that you can spy through the glass of a mason jar, it is inhumed, after all, and we are left to wonder what's going on beneath all that flour. The feeding of it is wholly unlike your sourdough starter, in terms of flour/water ratios, feed schedule, consistency, temperature, type of flour used, how it's stored. That's a lot to contend with when all you may want is a simple loaf of bread. The temperature issue, and it truly is an issue, is so fussy. For instance, your burgeoning culture must be kept within an unreasonable 16 degree range, 55-70 degrees, and by god, do not let it go a degree above 70 or all kinds of monkeys fly out of the sky. My initial thought was how the heck does anyone maintain a 55-70 degree range? I live in an apartment. There is no basement. The garage houses several peoples' cars, and probably some homeless folks in the dark hours when the building's populace is snoring into the stars. The few people on the net who have written about how to birth a Desem culture (and they either stole word-for-word straight from Laurel’s Bread Book, or they used their sourdough starter to kick start their Desem culture) either spoke of having a garage/cellar/basement and suggested that you get one in order to find success. They offer no solutions or suggestions to apartment dwellers with nonexistent underground resources like me. So now your already tedious Desem comes with a mortgage payment.
Then there is the issue of your culture's storage. The Laurel book asks you to make this mass of dough, then plunge it in 10 POUNDS of FRESHLY MILLED flour. No Laurel, oh girl. NO. That is way too much flour. After reading through the directions and working with the culture/baking bread with it, it never became clear why so much flour! I started with 5 pounds, and even that was not necessary. I eventually reduced it to 3 pounds which is more than ample to house your culture. (I ask that you mill the grain for feeding daily, as it provides the most enzymes for your growing culture, and do not use the flour that shelters your culture).
Another tedious factor, and I hate to do this to all of you anxious people who want to pursue this without a mill, is that you must freshly mill all flour in the making and storage of not only your culture, but the ensuing Desem breads as well. It is the only way to go with this project. Bagged flour loses so much of its vitality as it sits on supermarket shelves. Even millers with the best intentions face the reality of their product losing its spunk once it's at the market. Freshly milled flour is brimming with enzymes, and we want the most enzymes possible in the creation of our Desem cultures. I think we have all been faced with sluggish or erratic sourdough starters, especially those using whole wheat flour, and the only way to deal with this successfully is to use the freshest flour possible.
FINALLY, aside from temperature issues and the oddity of all that flour, the fermentation times/temperatures of your ensuing doughs take some maneuvering: 10 to 12 hours cool build x2, and 4 to 4 1/2 hours cool bulk fermentation, with a final 2 hour fermentation at 95 degrees. It turned out to be a bit of a logistical puzzle. Oh, and I say 'cool' here because you can't just pop it in the fridge for your build or your 4 to 4 1/2 hour bulk fermentation. It must be kept within that range that I discussed above and the refrigerator would be way too cold to ensure successful fermentation.
Sound insanely irresolvable? Well, I was determined to find a way, and not only that, but to simplify it for everyone so you don't have to pull your hair out trying to figure it out and we can get on with the business of playing with it, exploring it, making it ours. You've avoided this bread for years (and so have I) because it's a great unknown, yeah? Well, I've spent the past several weeks making loaves, working through about 75 pounds of grain and working out a system with some definitive measurements so you can get on with this crazy and incredibly rewarding bread with ease, because man alive! is it worth it.

As you read on, you will find that but a few short weeks of painstaking care of your culture will lead to oodles of loaves of the most amazing bread. You don't have to buy a new house with a garage/cellar. After you successfully raise your culture (and I have a fool-proof way to keep the temperature constant), you can store it in the fridge, feed it twice a week to maintain it, and simply 'build' it when you want to make a loaf of bread. I've outlined the how-to below. Simple. As. That.
DESEM: NEW BEGINNINGS
Just before Christmas, the last day of Chanukah actually, we wound up a mountain and took a woodsy holiday in a little cabin with a yellow door. As I had done some advanced planning, I found that the days and nights there promised the exact temperature range that I needed to get my Desem starter going. Well damn. If that ain’t a sign… The nights were a bit cooler than the lowest end of the range, but it turned out to be okay for the Desem.

My Desem: A first success
I have to say, there may have been a moment where I wondered if I had what it takes to get this thing going. When I baked up my first loaf with my eleven-day old culture, which you really need to do in order to understand what your Desem culture is and the scope of your project through all of its stages, not just the result, I was disheartened. Though the Laurel's Kitchen Bread Book warned that it would not bake up light and airy, rather, it would be dense and would not get much rise at all. But the flavor would be good, and one would benefit from seeing a baby culture at work and what it would produce so that there was some awareness of what one could expect as it matured.
Think, the reason you make such good bread now is because you endured quite a few unfortunate loaves (I say this with all the love in the world) and stuck with them. Over time and as your culture matured, they became less, well, pitiful, and now you know what to look for in your dough, the feel of it, the visual aspect of it, and also in your breads' flavors and textures. You approach bread baking and the maintenance of your starter from an empirical position rather than one theoretical or abstract. This is the reason I do not give away my sourdough starter. You need to build one on your own so that you can develop a relationship with it, and thereby, the loaves of bread that are birthed from it take on an entirely different meaning. It’s not just some magical thing that materialized out of thin air, your bread. You understand it because you created it, you were there from its inception, you’ve watched it grow, you’ve witnessed its adolescence and fostered its maturity. My starter and I are old friends. We've been working together for 8 years. I can tell by a quick glance exactly what mood it's in, what kind of bread it will make, what I need to do for it so that it makes the best bread possible. It has become second nature, making bread. I read my doughs like books. I know what the ensuing loaves will look like, and in any type of weather, I know how long they will ferment and how to manipulate the fermentation using visual and tactile cues. I would never have this connection if I did not build my starter from flour and water, time and attention.

I followed the Laurel book at the start, but abandoned it after the first week. The directive is indispensable, but I couldn’t stand working with cups as a standard of measurement. It leaves too much room for error, and baking is not arbitrary when it comes to measurements. I do not, for instance, just add a little more flour if my dough seems too wet. The weight of flour in a given loaf is constant, and every other weight hinges off of that. If I accidentally add too much water, I either try to scoop some out, or I live with it, but mostly I am fastidious about the addition of water and salt and use the proper devices to ensure that accidents are a rare occasion. For instance, I use a sake bottle with a pointed spout to feed my starter because I can control the stream to mere droplets, thus never adding too much. The tools you need for bread baking are few, so, do yourself a favor and explore which instruments work best for you and don’t deviate from your method. I tell everyone who has come to me for guidance in bread baking to first set up a corner of your kitchen for this purpose alone. You should not move your scale, your water bottle, your culture/spoon/dump container for any reason. If you have to hunt for things or pull your scale out of a drawer for every feed, then I guarantee you will not be baking bread consistently nor successfully, and your bread career will be short-lived.
Onward.
That first week in Desem land resulted in enormously erratic textures in the developing the culture. A cup of flour one day was too much, and I would have to do a balancing act adding more water, then oft more flour, to get the consistency right. The next day, it was not enough and the culture was too soft. Bakers need to use scales in their formulations. Not negotiable. So I actually started a new culture, first working out some proper weights in flour and water and setting a regular time of day to feed my culture so that the results would be reliable and consistent, and the culture took off much more successfully and reliably than the one that I tried using the Laurel book. I also went back and fed the Laurel starter using my new consistent units of measure, and it was not long before it too took off and remained reliable and consistent day after day. I now have two cultures, and they both work so wonderfully that I’m hard pressed to throw one of them away.
The Bread Builders book oddly ended up helping me more than the Laurel book despite its far less detailed directive. There was something about its concision, its laconic encapsulation of the process involved with the forging of what has been historically regarded as a complex bread, that resonated with me. This resonance was akin to the flooding of watercolor on paper for me, offering a beautifully vivid synopsis of Desem, my Desem. I found myself easily falling into its scheme, poetically because there is nothing more captivating than a lack of superfluity (something I have no talent for), more likely because I have a short attention span when it comes to following written directions. It's a weird deficiency in me. I have only ever managed to haphazardly browse any of my bread books, I know, a hard thing to admit, but there you have it. I'm more of a quickly-glance-over-then-wing-it kind of person. Something about the Bread Builders brevity respected my sensibility as a baker, as though to say 'hey, if you're reading this, you probably don't need your hand held, so here is more or less how I make this bread, go forth and prosper with it', and man, did it hit all the key points of what I felt was missing.

My culture was already well underway. I had completed the first round of breads and I wasn't thrilled with Laurel's baking style or the measuring scheme for the dough makeup (cups instead of weight, and I felt the measurements were off). So here I came up with a solution, and everything fell into place for me: I would use Laurel's direction for the day-to-day observation and care of the Desem culture, turn to Bread Builders for the Desem build and fermentation times on build and dough days, and I would come up with my own weights for flour and water and salt for my dough, as I did for my culture, and I would experiment with the bake using my usual method as a starting point, adjusting oven temperature and timing to suit my new bread. I would write it all down and in language that made sense in my given atmosphere, with my tools, and my schedule. The collaboration of the two books and my own intuition turned out to be of great success, and I have been baking Desem loaves ever since.
I wanted to mention that even though I managed to concretize the culture and dough components in weights, hydration, of course, is the one aspect that will need to be adjusted from loaf to loaf, dear reader, when you are ready to take on this project. But then, that is true with all our loaves of bread. I want to also mention that hydration will probably need to be adjusted as you feed your culture as well, but here only minutely so as the weather and the fineness of your grind changes from day to day. One day you might need 76g of water for the feed, the next 83g, and as it grows, maybe you need 94g. You get the picture. There will be some need for adaptation, but not wildly so, and be sure to keep clear notes so that you can go back and refer to them if something goes wrong (or right!), and you will know what to look for if something needs to be changed or if something works so splendidly you will want to repeat it. And finally, try to follow these instructions here to the letter before changing things. I am confident that this is a good template for you to begin your Desem journey with, and when you have the basics nailed down, you can start experimenting, and remember, ONE EXPERIMENT AT A TIME! If you are to adjust things, adjust one thing at at time, so that if something goes wrong (or wildly right!) you will know where and why.
Hydration is a thing that is ultimately determined by the thirst factor of your flour, the weather, and your mood. One day you might feel up to the task of a highly hydrated loaf, or perhaps you like a tighter crumb because you’re baking bread for sandwiches. Maybe the grind was a little coarse today, perhaps, a little fine. I always have a hydration starting point for my breads, enough to hydrate the dough, more on the moderate end I would say, but enough where it would bake up with fine results, and I add water according to my needs and mood. Sometimes I don’t feel like wrestling with a highly hydrated dough, other times I want to add olive oil in place of some of the water in my bread. For gift bread where I want to impress people, I pull back on the hydration just enough so that my loaves develop les grignes prononcé. Sometimes I want a big bubbly crackly thing, so I push the hydration to the brink and just deal with the spread as it’s slashed for the bake. Hydration is one area as a bread baker that you have freedom with, and you should take every opportunity to experiment with it because it radically changes the outcome of your bread, and not just in a superficial way like adding nuts or olives. Moreover, it pushes you to change how you handle your bread, not just mechanically, but with fermentation times and strategies. This is also how you come to learn about flour, how it behaves in a given bread and how it interacts with different levels of hydration. This is how you learn the practice of bread baking, how to adapt, how to evolve, and ultimately, getting to know your elements allows you to take command of your bread world.
Hydration is a thing that is ultimately determined by the thirst factor of your flour, the weather, and your mood. One day you might feel up to the task of a highly hydrated loaf, or perhaps you like a tighter crumb because you’re baking bread for sandwiches. Maybe the grind was a little coarse today, perhaps, a little fine. I always have a hydration starting point for my breads, enough to hydrate the dough, more on the moderate end I would say, but enough where it would bake up with fine results, and I add water according to my needs and mood. Sometimes I don’t feel like wrestling with a highly hydrated dough, other times I want to add olive oil in place of some of the water in my bread. For gift bread where I want to impress people, I pull back on the hydration just enough so that my loaves develop les grignes prononcé. Sometimes I want a big bubbly crackly thing, so I push the hydration to the brink and just deal with the spread as it’s slashed for the bake. Hydration is one area as a bread baker that you have freedom with, and you should take every opportunity to experiment with it because it radically changes the outcome of your bread, and not just in a superficial way like adding nuts or olives. Moreover, it pushes you to change how you handle your bread, not just mechanically, but with fermentation times and strategies. This is also how you come to learn about flour, how it behaves in a given bread and how it interacts with different levels of hydration. This is how you learn the practice of bread baking, how to adapt, how to evolve, and ultimately, getting to know your elements allows you to take command of your bread world.

ISO the perfect crumb
I’ve always said in my posts that the only way to do this bread thing is to experiment. You all do know that I don't have a background in baking bread. I am just like you. A lay baker with a persistent curiosity and a craving to feel fulfilled in the accomplishment of simple things that somehow manage to also nourish those whom I appreciate. My Desem knowledge is in its primordial stages, and it will evolve as I come to know how to work with my culture, how to work with these 100% whole grain doughs using freshly milled flour. I am still working out the best bake strategy, and as I learn, I will share my findings with you. As I mentioned, there is not a lot written about this bread. At first I was wondering how in the world will I learn how to do this bread, and now I’m thinking that I’m not limited in any way.
We know a few things: Desem is Flemish, it is made with 100% whole wheat, freshly milled by the baker, the fermentation times are long, the process manifold. It functions under cool conditions. The hydration appears to be modest (no hydration show offs here, it would seem, but we'll just see about that). The culture is created and maintained in a very specific and unique way and cannot be compared to sourdough starter. The breads that it yields are sweet, earthy and nutty tasting. The crumb is soft, as is the crust. It bakes up quickly and dries out rapidly (working on optimal storage for our Desem breads, and will share with you soon). But essentially Desem means ‘leaven’, and that ultimately tells me that it’s a bread risen by a natural medium, a humble bread that was made by housewives and bakers to feed their likely proletariat family members and community respectively. There was probably a ‘proper’ recipe/method for every pair of hands that made it, I can almost guarantee that its components were probably not weighed, and wedges of it were likely wrapped in cloth and stuffed into leather satchels to be consumed with hunks of cheese later in the day by workmen and children far from home.
Here we go.
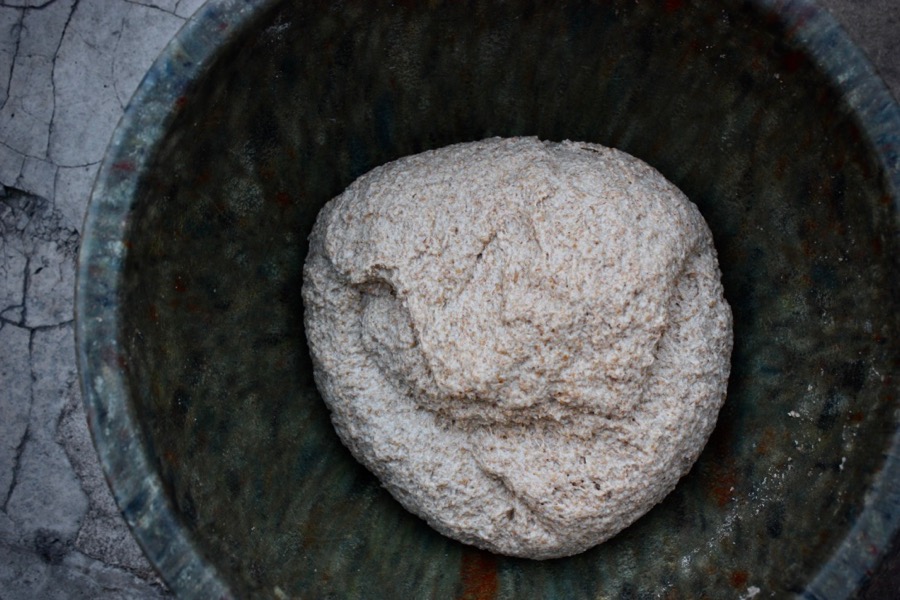
The birth of your Desem starter is going to be a little scary, but I’m here to hold your hand. The culture you are building is quite dense, so in the beginning there will be no perceptible activity. It will build over time, I promise, you can smell something happening. It will change from ‘wheaty’ to sweet and creamy smelling, but I didn't get any huge swelling with the thing until a few days in. And then it was less bubbly than it had developed a gluten network. Yes. Sign enough. That is fermentation. If there was no fermentation happening, the lump would be a solid mass with no gluten development or air pockets at all.

The Desem culture, activated
Have a look at this photo. Notice the gluten strands, wholly unlike the gaseous bubbles in your usual starter. This is GOOD! It means that your culture is active.
If you want, you can make your first loaf of bread at day eleven of your culture’s maturation. It will be far too young to raise the bread properly so expect a lopsided loaf with a high peak (you will get some rise), sloping sides, and a dense crumb, but it won’t be dry or unpleasantly compacted, and it will have those odd holes indicative of an adolescent culture. The crust will be a little tough upon emergence from the oven, but it will soften. Know that your first loaf is only to familiarize you with how to work with the dough and to taste it. You need to plunge your hands in it and feel it now so that you have an appreciation and an understanding of your next round.
I was vehemently opposed to baking a loaf with an immature culture at first, but now I see the value of it. You really do need to bake up your first loaf early on so that you can bond with your starter and understand the progression of your bread. Frankly, we saw the promise in our bread. It tasted really good. Sweet and nutty. We sliced it thin and ate it plain at first, then got crazy and had it with cheese. It was nice. So nice, in fact, that I silently thought 'if I can nail this bread THEN I will be a badass,’ but a humbled one, because man, this Desem situation is really, well, humbling. The rest of the bread went to the dog, and she was happy for it.

New beginnings: the very first loaf with a baby culture, too young to fully rise our bread
Your Desem will eventually be light. I mean, as light as a 100% whole wheat loaf can be, actually, no, I take that back. Setting out to mimic white flour breads with this is not only a mistake but does our whole Desem journey an injustice. We are not trying to duplicate any bread. Desem, like our other breads, deserves its very own place in our repertoire of fine loaves without the stress of comparison. Desem is light, and not just for a whole grain bread, it manages to be both light and toothsome. Its nutty complexity is delightful and humbling. The process of nurturing this bread into existence requires your absolute attention, and the maturity to progress down the bread path wide-open.
I think the reason why we've lost this bread in America, aside from the complexity of the process, is that Americans don't eat 'European-style' breads comprised of all or nearly all whole grains (think Vollkornbrot). It is because we have immature palates as a whole. We like fast food, sugar, fat and fast. We like pillowy, soft breads and are content to eat it from the supermarket shelves. We have a challenged relationship with slow, savory/funky/fermented, complexity. When I bake bread, I give it away without much thought. When I give my Desem loaves away, it is always accompanied by an explanation. People will eat this bread and they won't be delighted by it unless you grab their attention and educate them, because they have no relationship with the bake, with real bread like those of us who are keen on more interesting textures and flavors, those of us who know what it takes to make a loaf of bread milled from 100% whole grains. We are the Americans removed from the mainstream. I'm not sure which of my friends have thus far appreciated their Desem loaves. I will say that my boyfriend and I are enjoying it immensely. It has been a pleasure to sit down and nibble it plain, toasted (omg, toasted with olive oil is a whole new level of WOW), with cheese, with 'stuff'. Excellent with smoked salmon and onions. Herbs. This is the bread our hippie parents dreamed of, or made themselves. You know, tomato, hummus and sprout bread.
I think the reason why we've lost this bread in America, aside from the complexity of the process, is that Americans don't eat 'European-style' breads comprised of all or nearly all whole grains (think Vollkornbrot). It is because we have immature palates as a whole. We like fast food, sugar, fat and fast. We like pillowy, soft breads and are content to eat it from the supermarket shelves. We have a challenged relationship with slow, savory/funky/fermented, complexity. When I bake bread, I give it away without much thought. When I give my Desem loaves away, it is always accompanied by an explanation. People will eat this bread and they won't be delighted by it unless you grab their attention and educate them, because they have no relationship with the bake, with real bread like those of us who are keen on more interesting textures and flavors, those of us who know what it takes to make a loaf of bread milled from 100% whole grains. We are the Americans removed from the mainstream. I'm not sure which of my friends have thus far appreciated their Desem loaves. I will say that my boyfriend and I are enjoying it immensely. It has been a pleasure to sit down and nibble it plain, toasted (omg, toasted with olive oil is a whole new level of WOW), with cheese, with 'stuff'. Excellent with smoked salmon and onions. Herbs. This is the bread our hippie parents dreamed of, or made themselves. You know, tomato, hummus and sprout bread.

A lost bread is found again
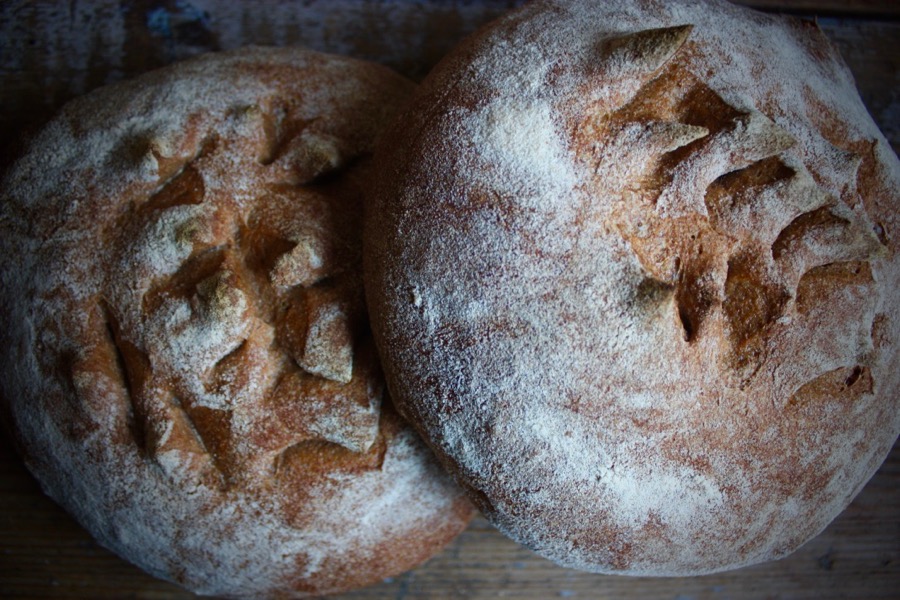
The second round of loaves were phenomenal. OMG, it was like the clouds parted and the sky was blue after the dark and brooding first loaf with the crazy holes.
There are still a few things to be hammered out, and as I continue to work with this starter, I will throw up posts and pull you along on this ride. One of the things I noticed is the unforgiving gas pockets that we can more or less press out or sometimes wholly ignore in our ‘usual’ sourdough breads. It is my opinion that they have time to get absorbed into the dough during the long and cold final fermentation of our usual loaves. With the Desem fermentation, you get 4 to 4.5 hour cool (not cold, mind) for the bulk, and 1.5 - 2 hours very warm for the final fermentation. That means that it’s going to ferment very quickly, create a lot of gas, and will not have a lot of time to absorb those gasses that have been pressed to the surface.

And you have to deal with these gas pockets, because you can't ignore them, and you cannot merely press them into the dough or smooth them out, because if you don't, what you see in the photo above ends up at the edges of your bread like they have in the photo here...
Pockets of gas
And you have to deal with these gas pockets, because you can't ignore them, and you cannot merely press them into the dough or smooth them out, because if you don't, what you see in the photo above ends up at the edges of your bread like they have in the photo here...

I cannot abide by this flaw in my breads. I hate them with a passion, so I quickly sought out a device to manage them, and it's a simple one, a skewer. Laurel does mention in her troubleshooting section that one ought to, 'poke 1/2” deep holes in the dough with a serving fork or skewer’, arbitrarily, it would seem, before sliding the dough into the oven (she makes no mention of scoring the dough at all) to prevent the crust from pulling away from the sponge, but she doesn't speak of directly addressing the gas pockets, so I can only imagine that this is what she meant. Rather than an arbitrary poking of the dough upon baking, which you can see here, and which I find really unsightly….

No. No, no, no. NO poking the Desem
I think that it makes more sense to poke the actual chambers to release the gasses. So, you shape your dough into it's final round, whereupon you will undoubtedly press gas chambers to the surface of your bread. They will remain trapped there unless you prick them open and release the gas. Just a quick stab with the skewer is all it takes. Does not compromise the bread whatsoever, and what you end up with is this:

A smooth surface sans the nasty little air pockets that can leave a baker crestfallen. Here is a test that I did (below), poking the holes on one side of the loaf and leaving them on the other side. As you can see, not poking the holes also compromises the structure of the bread, as is witnessed in the sloping side along with the insidious little pocket. After final fermentation, even though you have already pricked the gas chambers after shaping, if you notice a pocket before you slide it into the awaiting cast iron, I would encourage you to quickly prick it to release the gas before baking.

I should tell you that after your starter and first few loaves get rolling, you can refrigerate your Desem starter to hold it between bakes. After three weeks of running in and out of the house with ice packs to keep it cool, I can tell you, this will be a welcome relief. Here are loaves from our now very seasoned and capable Desem cultures…

Laurel does not ask for the combo cooker method but advises to ‘bake the bread at 450 degrees with steam’, with no mention of how to produce the steam, and we all know how, well, impossible it is to successfully hold steam in a cheap apartment oven, or even a decent one with a better seal. Bread Builders, Wing and Scott, have big wood ovens, so, they were not helpful in the temperature or method of bake. I’m not willing to not bake them in a combo cooker though because my cheap apartment oven does not hold steam well at all, and I know that baking it without a reliable method of steaming will just end up in heartbreak. Yes, I have tried the lava rocks with no success.
With that said, you should know that the bake temps are different than usual as well. 500 degrees, I think, is fine for initial steam, but at first I turned the oven down to 465-75 as I usually do, and I ended up with a dark bottom. To combat this, with the baking of the subsequent loaves, I now start at 500 as usual, then came down to 425 for the second half of the steam, and lower to 400 for the final stretch of the bake. I also employ a 4-ply layer of parchment paper instead of the single ply. So, one sheet folded in half then in half again. That seemed to work in preventing the dark bottoms. These breads bake quickly. You do NOT want your usual über dark bake on your Lost loaves. They should be caramel colored, not espresso or bittersweet chocolate dark. They take an hour, but check the temp at 45 minutes. At an hour, the breads came in at 210 degrees.
What else can I say. Oh, slashing is tricky, which is why you see a lot of snipped loaves on this post. The warm final fermentation makes it difficult to get a nice clean score as we normally do with our cold dough. I thought at first that it was due to a dull razor blade. Nope. I tried a new one and got the same serrated ears.

Oh, I wanted to mention that if you are still a little intimidated, don't be. I manage a very skeletal operation with basic tools. I'm a hippie, so this bread speaks to me most intimately, and my practices reflect a lack of pretension. I won't buy fancy stuff to make this happen. I have used slips of ill cut linen and Kitchenaid bowls as my 'bannetons' from the start. I have four of them and bought them for around $12 each on Ebay. They are the right size (4.5 qt), shape and depth for my dough. Bannetons are $40 bucks a pop. No thanks. The linens that I use to line the bowls are just squares that I cut from a bolt that I happened to have, and they are so old and burned from drying them out in my cooling oven after washing (and you must wash after each use), and I use my parchment paper until it turns to dust. I have one proper combo cooker (Lodge), but I also had one cast iron pan and a deep cast iron chicken fryer, as they are called, and they happen to fit more or less perfectly together. There is a 3/16" gap on one edge when the two halves are stacked mouth-to-mouth, and this little gap has never affected my bakes adversely. Nothing elaborate here. Use what you have. Spend minimal money to make this happen. Abiding by the words of Arthur Ash, I have managed to find humility and grace in the way I bake.


Well-loved linens, and parchment that has seen brighter days
A word about the grain. You will go through a lot of whole wheat for your project. So you may as well invest in a big bag. I used Great River Organic grains for my last post exclusively and I have used it again throughout this whole experiment, and man do I love them! Their grains produce Desem loaves with excellent flavor and amazing nuances. And they're organic! The breads therefrom are earthy, sweet, nutty and even floral at turns. They provide an excellent quality grain as well. I don't know about you, but the grain in the supermarket bins are suspicious and I have ended up with moths, bugs, larvae, rocks, twigs and worms from those bins. And once you have that in your cupboards, you are at risk of infesting your flours, beans and other grains. With Great River, I never have to worry about the quality of the grains (and this is not an affiliated post, I just believe in promoting things that I've tested and found to be of the best quality). I have provided a link below the post, just above the comments to the grain that I buy.


Great River FANTASTIC Grains!
Without further ado, I humbly give you the mad method to making the Desem starter. I've made numerous rounds of our Lost Bread, and this is the moment I feel confident about passing along the information to you. I have included, as always, lots of photos to assist with the hopefully clear explanation. Thank you, dear reader, for meeting me at the page, for enduring my prolix tendencies. I do this for you, and it warms me to know that somewhere in the world loaves are being pulled from ovens and they are making hearts sing.
DESEM: A NEW CULTURE FOR A LOST BREAD

DESEM IN A NUTSHELL
You will bring your Desem culture to life over 11 days with a highly controlled environment and daily feedings following the instructions below. Keep the temperature range at 55 - 70 degrees. You can accomplish this by placing ice packs of some sort around your burgeoning culture, and it should be stored in a naturally cool/shady place. For further insulation, I like to pack a thick blanket over the basin that I use to ferment my cultures. You will feed it ever day, the same amount of flour, and roughly the same amount of water, though you have some flexibility in this. You want the Desem to be pliable, but not too hydrated and certainly not dry.
After 11 days, if you please, you can make a couple of loaves of bread. This will help you deepen your relationship with your Desem culture. You certainly don't have to bake up loaves now, you can totally bypass this step if you want to, and if that is the case, you will keep feeding the Desem culture for a full 21 days before baking with it.
When you are ready to make your loaves, you will first build your Desem culture, what I mean by this is, you will make it bigger so that you have some to work with for your bread, and some to put away, your 'mother' culture, so to speak. You only maintain around 450-500g of Desem culture at a time. By the time you chip away the oxidized outer layer of your 450-500g Desem, you will have about 227g. The master formula that I created here makes two loaves of bread which need 454g of culture, so you would need to double that 227g to at least 454g to make those couple of loaves, but you will ALSO need to double THAT 454g to store away as your mother culture, remembering that we need to maintain at least 454g at all times so we can continue to bake our bread. This is where the word 'build' come in. You will BUILD your 227g culture to make your breads AND stow away as a mother. I will be playing with the numbers as we go so you can make as little as one loaf, and multiple loaves of bread. For now, I am working with the 2 loaf formula.
The first build will be from 10-12 hours. The second large build will take the same. Both builds must be kept cool! So, under the same conditions as you have been growing your culture. You have some wiggle room in terms of timing, as you can see. I've done both builds at 10 hours, and both at 12 hours and a combination thereof (for instance, build #1 at 10 hours, build #2 at 12 hours), with perfect results every time.
After the build (and stow away of the mother culture), you will do a 4 - 4.5 hour cool bulk fermentation, so, under the same conditions as you have been growing your culture. Remember, you will eventually be able to keep your culture alive in the fridge, but you will always do your culture builds and your bulk fermentation cool. (For now, anyway. I am only just starting to experiment with this bread, and I'm sure I will come up with some other methods as we move along, which, of course, I will share). Again, I have done both 4 hour and 4.5 hour bulk fermentations, both with fine results.
After the cool bulk, you will do a WARM final fermentation for an 1.5 - 2 hours. Warm as in 95 degrees. I accomplished this by using a heating pad on a sheet tray, a towel over that, and the bowls of dough that have been divided, benched, shaped and nestled in their linens. I also preheat the oven right away and close my kitchen door to trap the heat in and keep the ambient temperature as warm as possible. I have done both 1.5 and 2 hour final fermentations. When the ambient temp my kitchen is sufficiently warm, I find that 1.5 hours works well. If it has been struggling to maintain warmth, a 2 hour fermentation works well.
After the final fermentation, you will bake the bread. I start with a 500 degree oven with my combo cookers in place as well as a pizza stone. Slide the dough in. Bake covered for 15 minutes. Turn the ov down to 425 for the last 15 of the steam. Remove the lid, and bake out at 400 degrees. Desem browns quickly, and you don't want a super dark loaf here or the crust and the crumb will be dry and tough. I am still experimenting with bake times and temps, so please be patient with me as I find the perfect combination of heat/steam/time.
After the two experimental loaves on day 11, you will keep feeding your culture daily for another 10 days. On the 21st day, you will be able to make some fine loaves of bread from it as outlined above. At this point you may and should refrigerate the culture to maintain it unless you want to be squirreling around all day with ice packs to keep this thing cool. When stowed away in the fridge, you will reduce its feed from daily to twice a week. Whenever the mood to bake strikes, simply pull out the mother, do your builds, make your dough, and bake. The culture WILL continue to live in its bed of flour. You don't have to change the flour very often. I've only changed it once since I began the project a month and a half ago. I plan to only change the flour every 6 weeks or so.
Now, to get started...
* It is understood that the flour we are using for this entire post is hand-milled hard red winter or spring wheat, so I don't have to keep typing out 'hand-milled hard red winter or spring wheat' :)
THE CULTURE BUILDING METHOD
NOTE: For the feeds, please grind fresh flour every day so that you are inoculating your growing culture with as many enzymes as possible. Cool the flour before using it.
DAYS 1 AND 2
Grind 4 pounds of whole wheat flour and dump into a container large enough to hold this volume. I used Great River organic hard red spring wheat (link below to the 25 pound bag. I encourage you to get a big bag of it. You will use it in no time)
Pour 3 pounds of the flour into your awaiting container. From the leftover pound, tip 306g into a bowl and mix with 186g water. Form into a compact ball. The ball will be firm/rubbery/tight.


Bury it in the flour, making sure that the ball is completely submerged with no peeking parts. Cover the container with something, a kitchen towel secured with a rubberband, a lid, a plate… you want whatever you use to just sit atop the vessel. You don’t want to vacuum seal it, because it needs to breathe.


Bury it in the flour, making sure that the ball is completely submerged with no peeking parts. Cover the container with something, a kitchen towel secured with a rubberband, a lid, a plate… you want whatever you use to just sit atop the vessel. You don’t want to vacuum seal it, because it needs to breathe.
Store your culture in a cool area. Mine lives in a copper basin on my teeny porch that is thankfully made of stone and in the shade, so it stays cool. I covered the basin with a clean blanket that I folded up. It serves as insulation to keep the cold in (and curious critters from poking around). You want to maintain a temperature of 55-70 degrees.
The best way to accomplish this, I have found, is to begin this project at night to take advantage of the cool night air. In the morning, if the day starts to get warm, pull off the insulation blanket and surrounded the container with plastic bottles (from sports drinks, spring water, etc.) that you have filled with water and frozen overnight. Stuff the blanket back over the basin. You might be wondering why I didn’t just use a cooler. Well, a cooler without ice will be warm and I would have to constantly keep up the ice bottle situation. Storing the culture in the metal basin that sits on cold concrete will keep if far cooler.

(2 cultures and a gang of frozen water bottles live in here)
Leave this culture untouched for 48 hours.
_______________________
DAY 3
Pull out the burgeoning Desem culture. Chip away outer layer, discarding the dry fragments until the remaining Desem weighs 227g. In a largish bowl, rip the ball apart, add 152g flour and 76g water and amalgamate it with the awaiting ball. Plunge it back into the flour, cover, put to bed in whatever fashion you’ve settled upon to keep it cool, and be sure to maintain a cool, steady temperature until the next feed.

Chip away the outer layer

Amalgamate with flour and water....

Form into a ball...

Put it back to bed (be sure to submerge it fully in flour)
NOTE: If the ball is impossibly dry, then go ahead and add more water. You may have ground your flour on a different setting, thus needing more water than I did. Jot this amount down, if this is the grind you will continue to use, you will likely need the same amount of water to hydrate your developing Desem for the remainder of its feed.
You want the ball to be pliable. It should feel like Play-Doh. You don’t want it dry, but you don’t want it to be too hydrated either. You will notice some fermentation happening. It looks like the gluten is developed rather than the gassy chambers you are used to seeing in sourdough starter that lives on your counter.
_______________________
DAY 4
Pull out the burgeoning Desem culture. Chip away outer layer, discarding the dry fragments until the remaining Desem weighs 227g. In a largish bowl, rip the ball apart, add 152g flour and 76g water and amalgamate it with the awaiting ball. Plunge it back into the flour, cover, put to bed in whatever fashion you’ve settled upon to keep it cool, and be sure to maintain a cool, steady temperature until the next feed.

Desem, just unearthed


Starting to get stretchy...

Form...

Submerge...
_______________________
DAY 5
Pull out the burgeoning Desem culture. Chip away outer layer, discarding the dry fragments until the remaining Desem weighs 227g. In a largish bowl, rip the ball apart, add 152g flour and 76g water and amalgamate it with the awaiting ball. Plunge it back into the flour, cover, put to bed in whatever fashion you’ve settled upon to keep it cool, and be sure to maintain a cool, steady temperature until the next feed.
By now you should be the proud witness of some full on fermentation / some seriously gluten development. It will look like this as the days go on.

Unearthed...

Disrobed...
Mixed, and ready for bed...
_______________________
DAY 6
Pull out the burgeoning Desem culture. Chip away outer layer, discarding the dry fragments until the remaining Desem weighs 227g. In a largish bowl, rip the ball apart, add 152g flour and 76g water and amalgamate it with the awaiting ball. Plunge it back into the flour, cover, put to bed in whatever fashion you’ve settled upon to keep it cool, and be sure to maintain a cool, steady temperature until the next feed.
_______________________
DAY 7
Pull out the burgeoning Desem culture. Chip away outer layer, discarding the dry fragments until the remaining Desem weighs 227g. In a largish bowl, rip the ball apart, add 152g flour and 76g water and amalgamate it with the awaiting ball. Plunge it back into the flour, cover, put to bed in whatever fashion you’ve settled upon to keep it cool, and be sure to maintain a cool, steady temperature until the next feed.
_______________________
DAY 8
Pull out the burgeoning Desem culture. Chip away outer layer, discarding the dry fragments until the remaining Desem weighs 227g. In a largish bowl, rip the ball apart, add 152g flour and 81g water* and amalgamate it with the awaiting ball. Plunge it back into the flour, cover, put to bed in whatever fashion you’ve settled upon to keep it cool, and be sure to maintain a cool, steady temperature until the next feed.
* (was feeling a little dry)
_______________________
DAY 9
Pull out the burgeoning Desem culture. Chip away outer layer, discarding the dry fragments until the remaining Desem weighs 227g. In a largish bowl, rip the ball apart, add 152g flour and 94g water* and amalgamate it with the awaiting ball. Plunge it back into the flour, cover, put to bed in whatever fashion you’ve settled upon to keep it cool, and be sure to maintain a cool, steady temperature until the next feed.
* (was feeling a little dry)
_______________________
DAY 10
Pull out the burgeoning Desem culture. Chip away outer layer, discarding the dry fragments until the remaining Desem weighs 227g. In a largish bowl, rip the ball apart, add 152g flour and 94g water and amalgamate it with the awaiting ball. Plunge it back into the flour, cover, put to bed in whatever fashion you’ve settled upon to keep it cool, and be sure to maintain a cool, steady temperature until the next feed.
_______________________
DAY 11
THE DESEM BUILD
(I baked my loaves on day 8, FYI, but here I feel like a few more days might make a better loaf/be a little less disheartening, so, onto the Desem build...)
OK. Today we build our Desem culture to make two loaf of bread. You can bypass this step if you really do not want to bake up a loaf that you know is going to come out looking crazy. But I encourage you to! It’s part of the process. If you decide that you would rather not bake up today, then wait until the 21st day of your culture and proceed with the instructions below.
The method here produces two loaves of bread.
Pull out the burgeoning Desem culture. Chip away outer layer, discarding the dry fragments until the remaining Desem weighs 227g. In a largish bowl, rip the ball apart, add 152g flour and 95g water and amalgamate it with the awaiting ball.
THIS TIME YOU WILL NOT PLUNGE THE CULTURE IN FLOUR! You will ferment it NAKED. So, after amalgamation, place it in a bowl, cover it with something, a plate works well here, and put away for 10 hours to ferment in the same cool fashion that you are familiar with by now.
After 10 -12* hours, pull out the culture, rip it to pieces, add 304g flour and 223g of water and amalgamate. You should now have about 1,000g of Desem culture.
Divide this in half. Form one half into a ball, plunge it back into the flour. Cover, put to bed in whatever fashion you’ve settled upon to keep it cool, and be sure to maintain a cool, steady temperature until the next feed. THIS IS NOW YOUR NEW ‘MOTHER’ CULTURE.
Take the other half of the culture, leave it to ferment NAKED again. So, after amalgamation, place it in a bowl, cover it with your plate, and put away for 10 - 12 hours to ferment in the same cool fashion that you are familiar with by now.


Successfully built NAKED (half of the build, at least 454g, will be submerged in flour/stored away for the next bake)


Culture, ready to make bread!
*Notice the time range here. This should give you a little bit of flexibility in the timing of your Desem bake. The Desem schedule can be brutal. It takes a little planning so that you are not up at 3am feeding this thing (oh trust, I have serious bags under my eyes from this thing). I have included a couple of sample time schedules below so you don’t have to pull your hair out trying to figure out how you can manage things.
_______________________
DOUGH DAY
BULK FERMENTATION
After the Desem culture has happily fermented, it’s time to make the dough. Pull out the culture, break it apart into a bowl that will happily hold enough dough for two loaves of bread. Add 908g freshly milled flour, 741g water and 15g salt and amalgamate all of this.


Desem build
Mixed dough
Once it comes together in a cohesive mass, knead it on a clean surface for 15 minutes. Seriously. This is not a stretch and fold situation here. It needs to be kneaded.


Knead, knead, knead...


And knead some more
After you are done kneading it, and your little wing is sufficiently exhausted, cover the bowl (a big lid from one of your saucepan works well here), store it in its usual cool home, and ferment this COOL for the next 4 - 4.5 hours. Your dough will have puffed up nicely.

Nicely fermented
BENCH AND FINAL FERMENTATION
Tip the dough out onto your awaiting workspace. I actually like to tare my scale with the bowl on it, then weigh my dough so I can divide it evenly.
Use a bench scraper to divide the dough evenly.
Pull the sides of your doughs into its center and bench it for 15 minutes. I know that I don’t always bench (terrible habit), but with Desem you must.

Benched Desem
After the bench, shape the dough into tight boules. Prick any gas chambers that have been pressed to the surface with a skewer and get it into a banneton (or some vessel that suits your style) whose linen has been dusted with rice flour. I have found that you don’t need much. Ignore the ‘snowy’ loaves in some of my photos. I was overzealous about flouring the linens. But you need much less than your usual sourdough doughs.

Prick these with a skewer to release the gas
Now comes the next tricky part. You have to ferment this for 1.5 - 2 hours at 95 degrees. Yes, I know, i know. How? EASY!
Get a heating pad. Place it on a baking sheet. Turn it up to the lowest setting (mine is 113 degrees), cover this with a kitchen towel and set your bannetons/dough bowls on top of this. AND start preheating now. Turn the oven on to 350. That will warm the kitchen and help the dough rise.

Shaped and ready for final fermentation
When you have one hour left of your rise (I really like 2 hours fermentation time), turn the oven up to 500 degrees and pop your cast iron combos in there. Your oven should also be outfitted with a pizza stone.
THE BAKE
After the dough has successfully fermented, starting with one dough, place a quadrupled square of parchment over the mouth of the banneton/proofing vessel. Invert the dough onto an awaiting peel. Be sure to prick any gas chambers that have been pressed to the surface with a skewer quickly. Score with a razor blade or snip the dough with a scissors. Slide it into the shallow end of one of the awaiting combo cookers, cover with the fatty end, get it into the oven, and repeat the process with the remaining loaf.


Turned out..
Scored...
After 15 minutes, reduce the temp of the oven to 425 degrees. Bake another 15 minutes then take the lid off of the combo cooker, place it beneath the shallow half holding the bread, so that it is nestled into the mouth of it. This keeps a buffer between the loaf bottom and the hot stone, which you will need since Desem loaves darken quickly and easily.

Steamed...
Turn the oven down to 400 degrees and check its temperature after another 15 or 20 minutes. Take it to at least 210 degrees.
Cool on a wire rack. No, like really let it cool. You need a few hours for the loaf to finish baking and the crumb to set.

Lemme know if you have any questions, if you spot any errors in this long ass post (I usually go back and edit the day after so I can catch errors with fresh eyes), and if I can be of any help at all on your Desem Journey!
Below is the master formula for your Lost Bread and some scheduling suggestions.
CULTURE MAINTENANCE

After 21 days, you can safely store your Desem culture in the fridge. You need only to feed it twice a week as follows:
Pull your Desem culture from the fridge. Chip away the outer layer, keeping 227g of the soft interior, and discarding the hard/oxidized outer layer. Break the soft inner mass into a bowl. Add 152g freshly milled wheat flour and anywhere from 76-96g of water. Enough water to work into a pliable, cohesive mass. It should not be dry, nor shall it be too wet.
Plunge in its flour bed and put back into the fridge. You only need to swap out the flour that it lives in twice a month or so.
MASTER FORMULA (MAKES TWO LOAVES):
BUILD YOUR DESEM CULTURE
You will need (for day 1 of the build):
227g Desem culture
152g flour
94g water
10-12 hours fermentation time
You will need (for day 2 of the build):
All of the Desem culture that you built yesterday
304g flour
223g water
10-12 hours fermentation time
When you are ready to bake, pull your Desem culture from the fridge. Chip away the outer layer, keeping 227g of the soft interior, and discarding the hard/oxidized outer layer.
Break the 227g of soft inner mass into a bowl. Add 152g flour and 94g of water. Amalgamate into a cohesive mass, and ferment for 10 - 12 hours cool and naked, NOT IN THE REFRIGERATOR, but as directed in your designated Desem place, using ice packs when necessary to maintain a constant cool temp that does not rise above 70 degrees.
DAY 2 OF THE DESEM BUILD:
After 10 - 12 hours, break the mass of culture into bits, add 304g flour and 223g water and amalgamate. You should have around 1000g of culture. Divide it in half.
Take one half of the divided culture, form into a tight ball and plunge it back into its flour bed until you are ready to make another loaf of bread, feeding it once a week, mind, even if you don’t bake.
Ferment the remaining half for 10 - 12 hours as you did with the first build. This will be used to make your bread.
Ferment the remaining half for 10 - 12 hours as you did with the first build. This will be used to make your bread.
BUILD YOUR DOUGH
You will need:
The remaining half of Desem culture that you fermented for 10 - 12 hours
908g flour
741g water
15g sea salt
Break the mass of culture into bits. Add the 908g flour, 741g water and 15g sea salt. Amalgamate until you reach a cohesive mass.
Knead for a full 15 minutes.
Bulk ferment for 4 - 4.5 hours cool and naked (I like 4.5 hours), NOT IN THE REFRIGERATOR, but as directed in your designated Desem place, using ice packs when necessary to maintain a constant cool temp that does not rise above 70 degrees.
After it has fermented in bulk, weigh the dough, and divide in two perfect halves. Pull the sides of each dough into its center and bench it for 15 minutes.
After the bench, shape the dough into tight boules. Prick any gas chambers that have been pressed to the surface with a skewer, and get it into a banneton (or some vessel that suits your style) whose linen has been dusted with rice flour. I have found that you don’t need much. Ignore the ‘snowy’ loaves in some of my photos. I was overzealous about flouring the linens. But you need much less than your usual sourdough doughs.
Now comes the next tricky part. You have to ferment this for 1.5 - 2 hours at 95 degrees. Yes, I know, i know. How? EASY!
Get a heating pad. Place it on a baking sheet. Turn it up to the lowest setting (mine is 113 degrees), cover this with a kitchen towel and set your bannetons/dough bowls on top of this. AND start preheating now. Turn the oven on to 350. That will warm the kitchen and help the dough rise.
If you are like my friend D. Morton, and have a proofing box, you can use that.
If you are like my friend D. Morton, and have a proofing box, you can use that.
When you have one hour left of your rise (I really like 2 hours fermentation time), turn the oven up to 500 degrees and pop your cast iron combos in there. Your oven should also be outfitted with a pizza stone.
THE BAKE
After the dough has successfully fermented, starting with one dough, place a quadrupled square of parchment over the mouth of the banneton/proofing vessel. Invert the dough onto an awaiting peel. Be sure to prick any gas chambers that have been pressed to the surface with a skewer quickly. Score with a razor blade or snip the dough with a scissors. Slide it into the shallow end of one of the awaiting combo cookers, cover with the fatty end, get it into the oven, and repeat the process with the remaining loaf.
After 15 minutes, reduce the temp of the oven to 425 degrees. Bake another 15 minutes then take the lid off of the combo cooker, place it beneath the shallow half holding the bread, so that it is nestled into the mouth of it. This keeps a buffer between the loaf bottom and the hot stone, which you will need since Desem loaves darken quickly and easily.
Turn the oven down to 400 degrees and check its temperature after another 15 or 20 minutes. Take it to at least 210 degrees.
Cool on a wire rack. No, like really let it cool. You need a few hours for the loaf to finish baking and the crumb to set.
SAMPLE SCHEDULES
(so you don’t pull your hair out)
IN TIME FOR DINNER
(2x 12 hour Desem builds)
6am till 6pm - first Desem build, cool
6pm till 6am - second Desem build, cool
6:00am till 6:20am - build the dough and knead for a full 15 minutes
6:20am till 10:50am - 4.5 hour cool bulk fermentation
10:50am -11:10am - divide, loose shape/bench
11:10am - 1:10pm - shape/banneton, 95 degree final fermentation
(preheat for an hour at 350 just to warm the kitchen, and then crank to 500 for the final
hour, making sure your pizza stone and combo cooker are in the oven)
1:10pm - 2:10pm bake
IN TIME FOR DINNER
(2x 10 hour Desem builds)
11am till 9pm - first Desem build
9pm till 7am - second Desem build
7am till 7:20am - build the dough and knead for a full 15 minutes
7:20am till 11:50am - 4.5 hour cool bulk fermentation
11:50am - 12:10pm divide, loose shape/bench
12:10pm - 2:10pm - shape/banneton, 95 degree final fermentation
(preheat for an hour at 350 just to warm the kitchen, and then crank to 500 for the final hour, making sure your pizza stone and combo cooker are in the oven)
2:10pm - 3:10pm bake
To the Staff of Life!
THE LOST BREAD PHOTOS


